A pipe bursts. A storm floods your yard. Suddenly, you’re standing in water wondering what to do first. If you’re trying to figure out how to clean up water damage, take a breath — you’re in the right place.
In this guide, we’ll walk you through the exact steps to take, from the first five minutes to the final disinfecting wipe-down. We’ll also cover what supplies you need, what to throw away, and when it’s time to stop DIY-ing and call in a professional.
Key Takeaways
- Speed matters. The faster you remove water and start drying, the lower your risk of mold.
- DIY cleanup works for small, clean-water incidents — not for contaminated water or large areas.
- Drying out a space fully can take several days, even after standing water is gone.
- Some materials, like soaked drywall or insulation, often need to be thrown away rather than dried.
- When in doubt, a professional inspection can confirm what’s safe to keep and what isn’t.
Is It Safe to Clean Up Water Damage Yourself?
Sometimes, yes. Cleaning up water damage yourself is realistic for small, clean-water incidents — for example, a leaking appliance you caught quickly. However, the same isn’t true for contaminated water cleanup, like sewage backups or flood water from outside your home.
Before you start, put on gloves and boots, and turn off electricity to the affected area if there’s any chance water reached outlets or wiring. These basic safety precautions for water damage protect you no matter the size of the job.
If the water is contaminated, or if you’re unsure, it’s always safer to call our team at Water Rehab & Restoration first. We offer free inspections, so you’ll know exactly what you’re dealing with before you touch a thing.
Step-by-Step: How to Clean Up Water Damage in a House
Once you’ve confirmed it’s safe to proceed, here’s how to clean up water damage in a house, step by step.
Step 1: Stop the Source and Ensure Safety
First, stop the water at its source. Shut off the main valve for a burst pipe, or move furniture and belongings away from rising water. Then, confirm the area is safe before you go any further.
Step 2: Remove Standing Water
Next, focus on water extraction. For small amounts, a wet vacuum for water damage works well. For larger volumes, you’ll likely need a sump pump or, better yet, our team’s industrial extraction equipment.
Not Sure If DIY Is Enough?
Step 3: Dry Out the Space
After that, it’s time to focus on drying. Learning how to dry out a house after water damage means combining air movers and dehumidifiers to pull moisture from both the air and any porous materials. Open windows too, if weather allows, since airflow speeds up drying out water damage significantly.
Step 4: Clean and Disinfect
Once everything is dry, move on to disinfecting. Knowing how to disinfect a house after water damage is essential, especially if the water was contaminated. Sanitizing after water damage removes bacteria that fans and dehumidifiers can’t touch.
Step 5: Clean Specific Materials
From there, address each material separately, since they don’t all respond the same way.
- How to clean carpet after water damage: extract water first, then shampoo and fully dry — or replace the pad underneath.
- How to clean walls after water damage: wipe washable surfaces, and check drywall for softness or bubbling.
- How to clean floors after water damage: hardwood and laminate often need professional-grade drying to prevent warping.
Step 6: Know What to Throw Away
Finally, sort out what to throw away after water damage. As a rule, porous materials — carpet padding, insulation, particleboard furniture, and drywall soaked for more than 48 hours — usually can’t be saved. Before you toss anything, though, photograph it for your insurance claim.

How Long Does It Take to Clean Up Water Damage?
Generally, small, clean-water incidents take a few days to fully dry, while larger jobs can take a week or longer. Even so, don’t rush this part. Cutting drying time short is one of the most common reasons mold shows up later. For more on that, see our guide on musty smell after water damage.
What Supplies Do You Need to Clean Up Water Damage?
If you’re tackling a small job yourself, here’s what supplies you need to clean up water damage:
- Wet/dry shop vacuum
- Fans and a dehumidifier
- Rubber gloves and boots
- Disinfectant or antimicrobial spray
- Moisture meter (optional, but helpful)
- Trash bags for damaged materials
Cleaning Up Water Damage on Your Own?
When to Call a Professional Instead of DIY
Even so, some situations call for more than a wet vacuum and a few fans. Consider searching for professional water damage cleanup near me if:
- Standing water has been present for more than 48 hours
- The water came from a sewage backup or flood
- Water reached behind walls, under flooring, or into the HVAC system
- The affected area covers more than one room
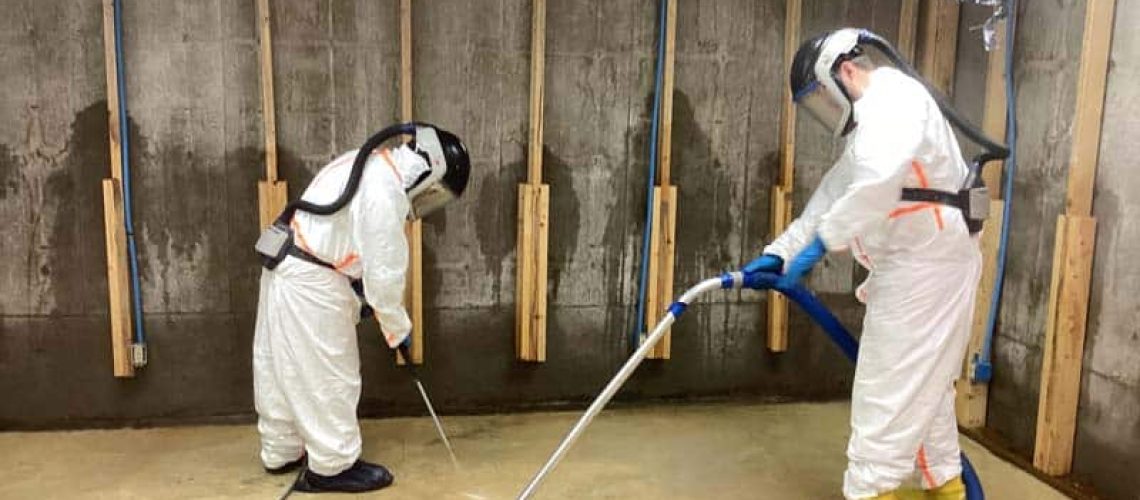
In these cases, emergency water extraction services make a real difference. Our water damage restoration process includes thermal imaging and structural drying equipment that go well beyond what DIY tools can do — which means a faster, more thorough result.
Water Damage Cleanup in Dallas–Fort Worth
For homeowners handling water damage cleanup in Dallas, Fort Worth, Plano, or Arlington, Texas humidity adds an extra challenge. Even after standing water is gone, our climate slows down natural drying, which means DIY methods often need extra time — or extra help.
Between heavy spring storms and long, humid summers, emergency water cleanup in DFW is one of the most common calls our team receives. If you’re located anywhere in the metro area, Water Rehab & Restoration is ready to respond, day or night.
Frequently Asked Questions
Can I clean up water damage myself?
Yes, for small, clean-water incidents. Remove standing water quickly, dry the area with fans and a dehumidifier, then disinfect. For contaminated water or damage affecting multiple rooms, a professional is safer and more thorough.
How long does it take to clean up water damage?
Small incidents typically dry within a few days. Larger or more saturated areas can take a week or longer. Rushing this step raises the risk of mold, so it's worth being patient.
What supplies do I need to clean up water damage?
At minimum, you'll need a wet/dry vacuum, fans, a dehumidifier, gloves, disinfectant, and trash bags for damaged materials. A moisture meter is helpful but optional for smaller jobs.
What should I throw away after water damage?
Porous materials soaked for more than 48 hours — like carpet padding, insulation, and particleboard furniture — usually can't be saved. Photograph everything for insurance before disposal.
How much does professional water damage cleanup cost?
Cost depends on the size and severity of the damage, plus whether contamination or structural drying is involved. A free inspection is the best way to get an accurate, itemized estimate.
Ready to Get Your Home Back to Normal?
Cleaning up water damage takes speed, the right tools, and knowing when to stop and call for backup. If you’re anywhere in Dallas, Fort Worth, Plano, or Arlington, Water Rehab Restoration is available 24/7 with free inspections, transparent pricing, and hands-on insurance claim support — so you’re never handling this alone.
Contact us today and get the professional help you need!